How we work · Lincoln, NE
Our Cabinet Painting Process, Step by Step
Cabinet painting looks simple from outside and almost all of the quality lives in stages you never see. Degreasing, sanding between coats, and respecting cure time are the three things that decide whether a finish lasts ten years or starts chipping at the handles in eighteen months, and all three are invisible in a photograph of a finished kitchen.
This page is the full version of what we do, in order, with the reasoning for each stage and how long it takes. It is deliberately more detail than most people want, because the alternative is asking you to take our word for it.
Six to eight working days for an average Lincoln kitchen, two to three of those with us in your house. Here is what happens on each of them.
- 6–8 working days, average kitchen
- 2–3 days with us in the house
- Dates confirmed before we start
- Walk-through under a work light
Before Anything: The In-Home Estimate
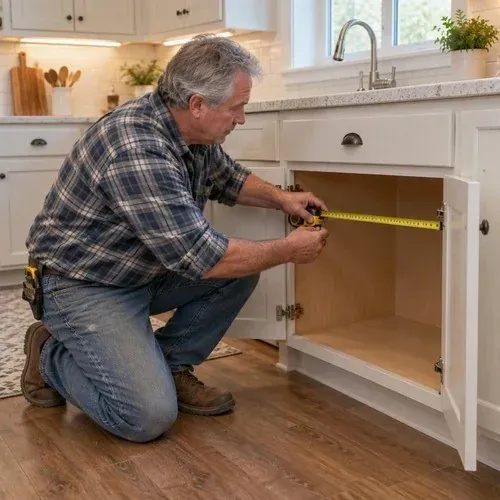
About forty minutes in your kitchen, free, with no obligation and no salesperson. We count every door, drawer front and end panel, check the boxes for water damage and failed joints, test the existing finish for adhesion where it has already been painted, and identify the species so the grain-filling question can be answered honestly.
You get a written quote with the exact door and drawer count on it. That count is what stops a number moving halfway through the job, and it is the single most useful thing on the page.
If the honest answer is that you should not do this, whether that is failing carcasses, a layout that needs changing, or cabinetry worth restoring rather than painting, we will say so at the estimate. We turn down work on that basis regularly.
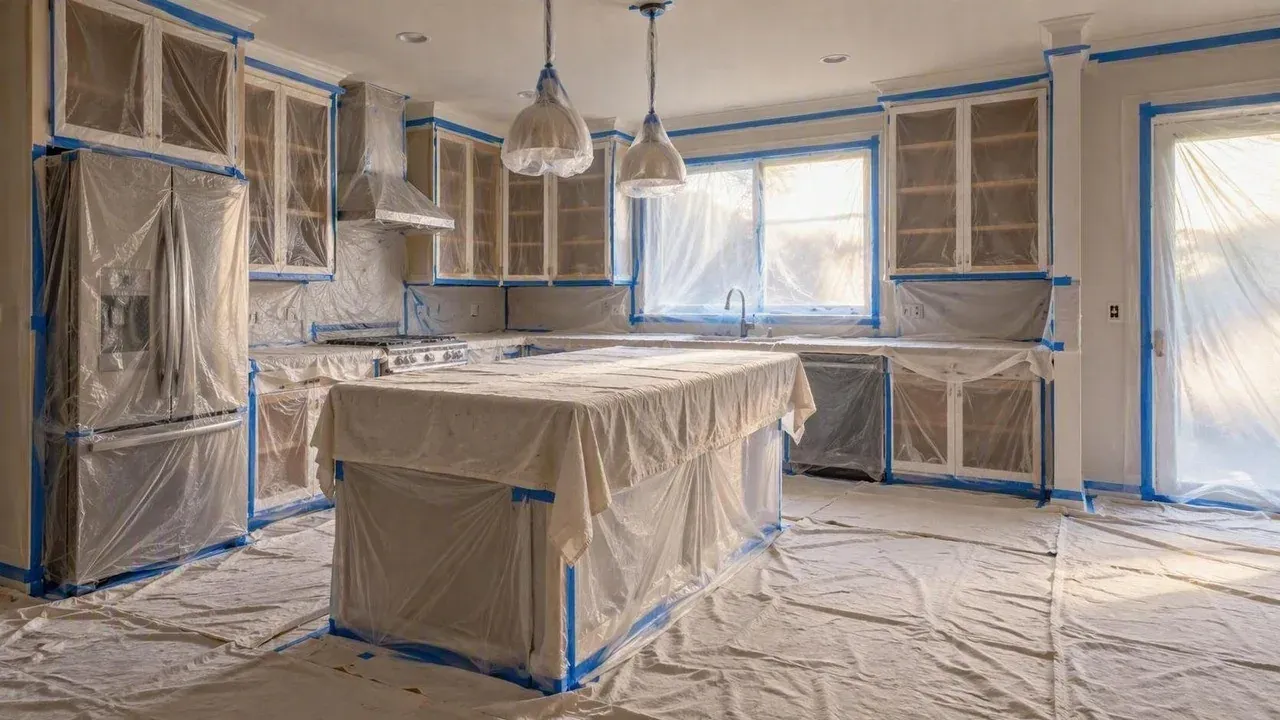
Day 1: Protection, Removal and Labelling
Containment goes up
Plastic sheeting, floor protection, and dust barriers across every opening into the rest of the house. Countertops, appliances and backsplash are masked. Extraction is set up for the on-site spray days.
Doors and drawer fronts come off
Every front is numbered to its opening. Hinges and hardware go into labelled bags. Nothing is mixed between cabinets, which is why the reinstall is an exact reversal rather than a puzzle.
Loaded and taken to the shop
Doors travel to 300 N 44th St racked, not stacked. From here your kitchen works as open shelving and stays fully usable.
Days 2 to 3: Degreasing and Preparation
The stage that decides whether the finish holds, and the stage cheap jobs cut.
Degreasing comes first and it is done twice. A solvent wash, then a detergent wash. Cooking grease and silicone furniture polish are the top two causes of adhesion failure on kitchen cabinets, and both are invisible. The doors either side of the range and the cabinet above the cooktop get particular attention because that is where the film is heaviest.
Then sanding, to give the primer a mechanical key rather than relying on chemistry alone. This is the step that bonding-primer marketing claims you can skip. On a fifteen-year-old kitchen you cannot, and skipping it is the most reliable way to produce a finish that peels off in sheets at the handles.
Then repairs. Loose joints re-glued and clamped, dents filled, split rails repaired, water-damaged box bottoms replaced. Anything structural is fixed before a single coat goes on, because refinishing over a failing joint wastes the entire job.
Then grain filling, if the species needs it. Oak has deep open pores that paint flows into rather than over. Paste filler is worked across the grain, cured and sanded flush, usually twice on heavily open oak. The full explanation is on the painting oak cabinets page.
Days 3 to 6: Priming and Spraying

Doors are sprayed flat on racks in a dust-controlled booth. Flat matters: a horizontal surface lets the coating level under gravity with no chance of a run or a sag, which is exactly what you cannot get spraying a door hanging vertically in a garage.
Bonding primer
One full coat, both faces and all four edges, then left to cure properly rather than recoated as soon as it is dry to the touch.
Sand back
The primer is sanded flat. This is what decides whether the finish is smooth at eye level, and it is the step that separates a shop job from a site job.
Two finish coats
Pre-catalyzed lacquer or a two-component urethane depending on substrate and colour, with a full cure between coats. Dark-to-white changes sometimes need a third.
Boxes sprayed on site
One or two days back in your kitchen with containment up and extraction running, spraying face frames, box exteriors and end panels in place.
Days 7 to 8: Reinstall, Adjust and Walk Through
Doors return to their original openings
Every front goes back where it came from, using the numbering from day one. Cabinets are not identical even within a single kitchen, and a swapped door shows in the reveal.
Hinges adjusted
Every door aligned so the gaps are even across the whole run. This pass takes longer than people expect and it is what makes a finished kitchen look finished.
Hardware and bumpers
Pulls and knobs fitted, old holes filled and re-drilled if the pattern has changed, and soft bumpers on every door and drawer front.
Walk-through under a work light
We go round the kitchen with you and a raking light, which shows every flaw that ordinary room lighting hides. Anything you flag gets fixed before we leave.
Touch-up kit and care notes
You keep a small quantity of your exact finish colour, plus written notes on the first two weeks: light touch, no tape on painted faces, no abrasive cleaners ever.
What Is Different for Refinishing and Refacing
| Service | Timeline | Key difference |
|---|---|---|
| Kitchen cabinet painting | 6 – 8 working days | The process described above |
| Cabinet refinishing | 8 – 12 working days | Full chemical strip, conditioner, hand-wiped stain |
| Cabinet refacing | 3 – 5 weeks, then 2 – 4 days install | Doors made to size off site, no shop cycle on your doors |
| Bathroom vanity refinishing | 2 – 3 days | Moisture-rated coatings, countertop optional |
| Built-in cabinet painting | 2 – 5 days | Room-specific coatings, usually bundled with a kitchen |
Refinishing is the longest because stripping cannot be rushed and stain has to be worked by hand rather than sprayed. Refacing has the longest wall-clock time but the shortest disruption, because the three-to-five-week lead is spent at the door manufacturer while your kitchen carries on working normally.
Process FAQs
What is the process to paint kitchen cabinets?
Seven stages: measure and count at the estimate; label and remove doors, hinges and hardware; degrease twice, with solvent and then detergent; sand, grain fill and repair; prime and sand back; two finish coats with doors sprayed flat in the shop and boxes sprayed on site; then reinstall, adjust hinges, fit hardware and walk through under a work light. Six to eight working days for an average Lincoln kitchen.
Can I use my kitchen while the cabinets are being painted?
Yes, almost throughout. Once the doors are off, your cabinets work as open shelving and everything stays reachable. Plumbing and appliances stay connected. The exception is the one or two days we spray the boxes, when the room needs to stay sealed and empty. We give you those dates in advance so you can plan around them.
How long before I can use the cabinets normally?
Boxes and shelves are ready as soon as we finish the walk-through. Doors and drawer fronts want a light touch for the first two weeks while the coating continues hardening past the dry-to-touch stage. No tape on painted faces during that window, and no abrasive cleaners at any point.
How long does cabinet painting take?
Six to eight working days for an average kitchen of 24 to 34 doors and drawer fronts. We are only in your house for two or three of those, one removal day, one or two days spraying boxes, and one install day. The rest is shop time on your doors.
Why do the doors have to leave my house?
Because they get sprayed flat. A horizontal surface lets the coating level under gravity with no runs or sags, and a dust-controlled booth means nothing lands in a wet film. Spraying a door hanging vertically in a garage produces a visibly worse finish, and it is the main reason a shop job looks different from a site job.
What happens if I am not happy with something?
Raise it at the walk-through, which is exactly what the walk-through is for. We go round with a raking work light specifically because it shows flaws that normal room lighting hides. We would rather find them with you than have you find them a week later. Anything flagged gets fixed before we leave.
Free in-home estimate
Start With a Free Estimate
Forty minutes, a written quote with your door count on it, and an honest answer about whether this is the right job for your kitchen. See what it costs first if you prefer.
Service by service
How the process differs by service
Kitchen Cabinet Painting
Doors come to our spray shop, boxes are sprayed in place, and your kitchen goes back together in about a week with a factory-smooth finish.
Read moreBathroom Vanity Refinishing
Repaint or refinish the vanity you already have, including the countertop and sink, without disconnecting a single plumbing fitting.
Read moreCabinet Refacing
New doors, new drawer fronts and matching veneer on the boxes you already have, for when paint alone will not fix a dated door profile.
Read moreCabinet Refinishing & Restaining
Keep the wood grain, lose the worn finish. Stripping, restaining and a new protective topcoat for cabinets worth showing rather than covering.
Read morePainting Oak Cabinets
Golden oak to smooth modern white, with the grain properly filled so the finished door does not still read as oak from across the room.
Read moreBuilt-In & Laundry Cabinets
Laundry cabinets, mudroom lockers, office built-ins, bookcases and basement bars, painted to match the kitchen you just had done.
Read more